Educational videos come in different shapes: step-by-step guides, lecture recordings, course navigations, project feedback, topic previews, and others. Their main advantages include flexibility, constant improvement of content, low cost, and a chance to engage students from all corners of the world. Creating such videos is a great way to share your knowledge, gain new skills, make friends, and earn money. Especially now when the shift towards remote learning continues. However, it is not easy to create professional videos with millions of views. In this article, we will cover the most common mistakes to avoid and tips to follow.
- Create a storyboard
Web education has been on the rise and millions of users worldwide create different types of videos every day. But do you know what differs successful educators? They have a storyboard for every video. It is a plan of the future content that includes information about the subject, location setting, situation of the camera, shot type, movements, number of participants, and other issues. The more detailed you are, the fewer problems and surprises you are going to face in the process.
- Write the script
It doesn’t matter whether you want to make a film or a short video clip: you need to create a script. Here are a few things to remember:
- Make your introduction engaging by inserting a quote, joke, or statistics
- Act natural and be yourself
- Concentrate on the key points
- Use examples
- Thank viewers for watching the video
When the script is written, read it aloud to make sure that it sounds smooth and interesting.
- Engage the audience
While many users turn to video streaming due to the highest engagement rate, educational videos can also be rewarding if approached correctly. There are many ways how you can make your videos interesting. First of all, you should transmit your passion to the subject. Cold and impersonal videos won’t gain loyal viewers. You can also insert quizzes, questions, and prizes for leaving comments under the video. Give viewers a sense of community and they will gladly return to you over and over again.
- Choose the right video length
The common rule of educational content says – the shorter, the better. This means that your videos should be straight to the point and brief. Read the requirements of the chosen educational platform and if else is not stated, stick to 10 – 20 minutes length. The videos should be easy to digest and not overloaded with information. If the viewers decide to download from YouTube or another website, the last thing they want is to spend hours waiting for the file.
- Use a green screen
Some video creators are afraid of using green screens because they think it is difficult and time-consuming. Well, it may be at first but has a wide range of advantages. With a green screen, you can record videos on literally any background, hide imperfections of your home, and contribute to branding. It also reduces time spent on preparing the surroundings and is extremely flexible and portable. An irreplaceable element for creators of educational videos!
- Invest in good equipment
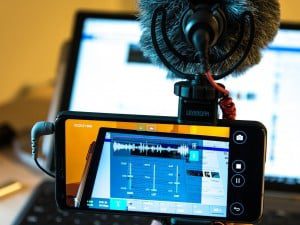
A professional video is a must if you want to occupy firm positions in the virtual educational arena. That is why you need to spend some money on a quality vlogger camera, microphone, headsets, and other equipment. And don’t forget about good lighting which is one of the most important elements of great videos. The good news is that if you are a student or a teacher, Apple Education Store may give significant discounts. And, if you do have the budget, you can allow one of the top Portland video production companies to worry about equipment while you focus on content creation.”
- Use professional editing tools
Video editing is a crucial element of the process. It makes your educational content interesting, good-looking, and free from imperfections. With the help of an animation maker you can make videos more engaging and by using screencasting tools – insert what is happening on your computer. Beginners should consider a free video editor, while experienced users can invest in a paid one. The most popular editing tools are FlexClip, Wirewax, FlashBack, Animoto, Filmora, Wideo, and Clipchamp.
- Compress videos
Without video compression, loading time can reach days. Exhausting, right? That is why you should use video compression software to reduce the loading time and minimize buffering for the viewers. It allows compressing videos by half without harming the quality and choosing almost any format. This means that your video can be played on any website and software.
- Pick the right platform
Depending on your niche and target audience, the choice of the platform to publish videos may vary. Some of them are free, while others – paid. There are also websites that have both free and premium packages. The most popular platforms for educational videos are YouTube, Facebook, Metacafe, Break, Vimeo, Dailymotion, Flickr, and Veoh. We recommend choosing several websites and social media networks to attract as many users as possible.
10. Check user engagement
Your work doesn’t stop when the video is uploaded. The next step should include analytics, i.e. collecting data on how the audience watches your videos, what they like and don’t like. The most visual indicators are total plays, play rate, and average engagement. You can use free analytical programs by Google or invest in paid ones. All of them work well and give lots of valuable insights on the things that should be improved in the future.
Concluding thoughts…
Now you know that creating educational videos requires a thoughtful and step-by-step approach. First, invest in a vlogger camera or another equipment of your choice, then download iMovie and other tools for creating great videos. Don’t forget about writing an engaging script and inserting images, animation, and other elements into the content. If you lack inspiration, research other online educators and you will surely find fresh ideas to get started.


