Tinkercad is a free and easy-to-use app that allows students to design in 3D, which can then be printed using a 3D printer. These Tinkercad sessions below can be particularly useful for helping to familiarise students with this application.
Before delivering these sessions, make sure to create an Educator account for Tinkercad first. You’ll then be able to share a special code with students to enable them to join on a student account.
Lesson Part One – Create a 3D version of your name in Tinkercad
Introduction
Begin this unit by showing students this video about 3D printing:
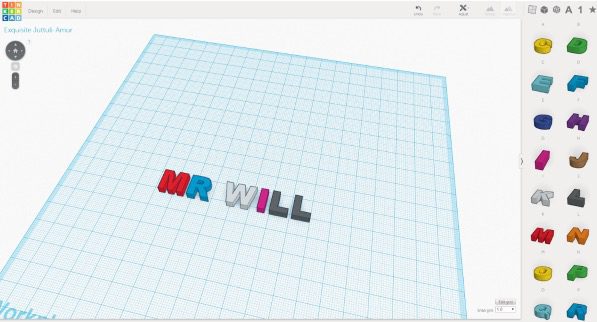
Explain that 3D printing is becoming increasingly common, and it begins with creating a 3D design. For these lessons, we’ll be learning how to use a program called Tinkercad. We begin here by using Tinkercad to create our name using 3D letters.
Model for the students how to drag the 3D letters over to the workplane. Show students how to resize and reposition the letters.
Activity
Students should go ahead and create a 3D design of their name. As an extension, they can explore and add additional 3D designs to the workplane. When finished, students should take a screenshot of their design in order to upload to their digital portfolio.
Lesson Part Two – Create a 3D design of an anchor
Introduction
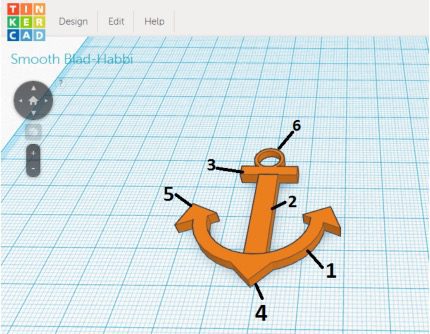
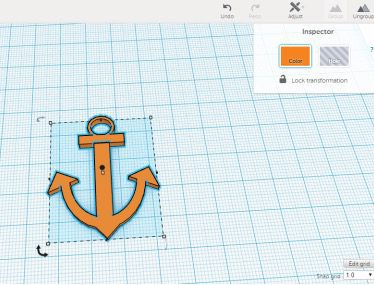
Explain to the students that in order to develop some of the more advanced skills in 3D modelling, their task in this session will be to design a 3D anchor.
Part 1. Select and drag the shape of “thin tube” onto the workplane. Scale the sides to the following dimensions: x = 27 mm, y = 32 mm, z = 3 mm.
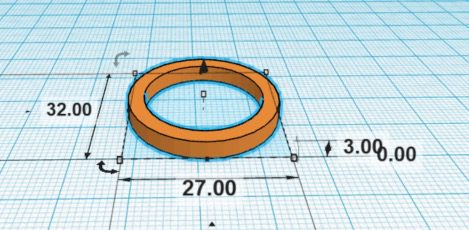
Click on the ‘box hole’ shape from the tab section named ‘holes’. Then, drag a new box hole halfway over the thin tube. Adjust the dimensions of the box hole as shown in the picture: x = 35 mm, y = 20 mm, z = 3 mm.
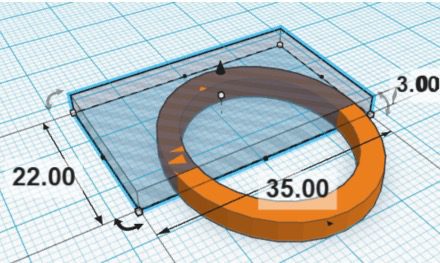
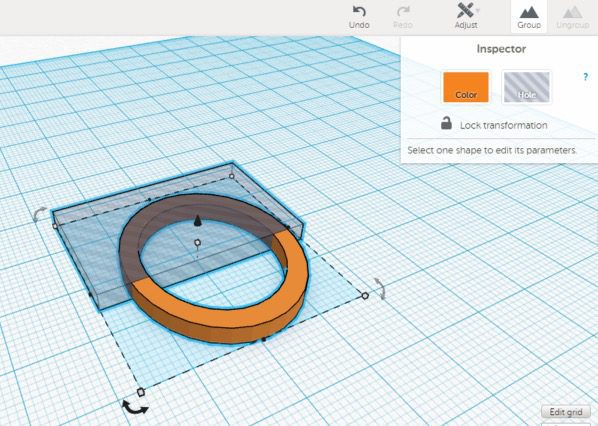
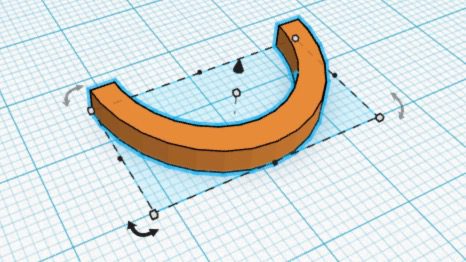
Select both shapes, ‘thin tube’ and ‘box-hole’. (To do this, hold down the shift button whilst clicking on both shapes with the cursor.) While both shapes are selected, click on the ‘group’ icon at the top of the page. As soon as you do this, the part of the tube that is hidden by the box hole will be erased.
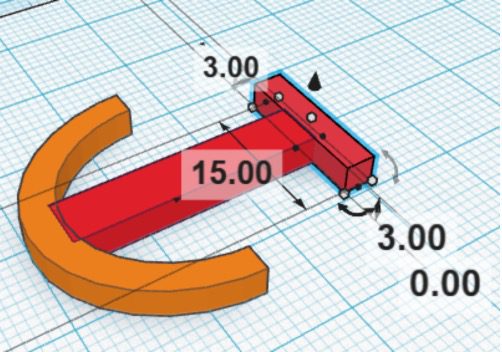
Part 2. Next, add a ‘box’ shape to the workplane. The sizes should be defined as: x = 35 mm, y = 25 mm, z = 3 mm. Place the box in the middle of the tube (part 1).
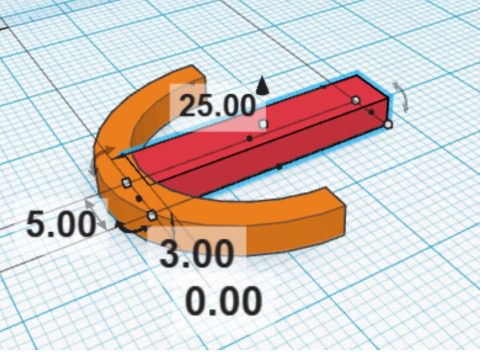
Part 3. Add another box with different dimensions: x = 15 mm, y = 3 mm, z = 3 mm. Place the new box (part 3) to the edge of the previous one.
Part 4. Add a ‘roof’ shape (part 4):
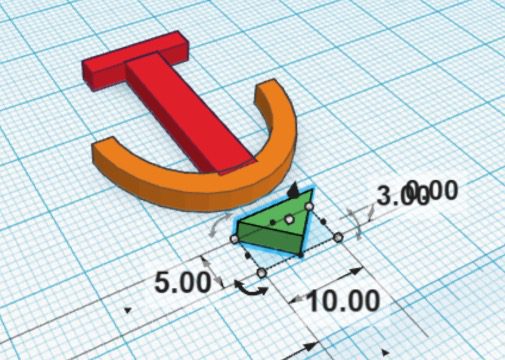
Place the roof as it is merged into the tube. The sharp edge of the roof should be kept out of the tube.
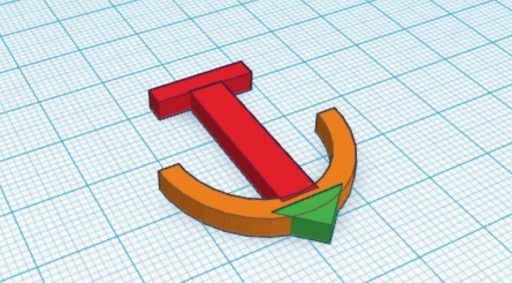
Part 5. Copy and paste the roof shape twice. Drag the new copies of the roof to each of the edges of the tube, rotating them both slightly as shown below:
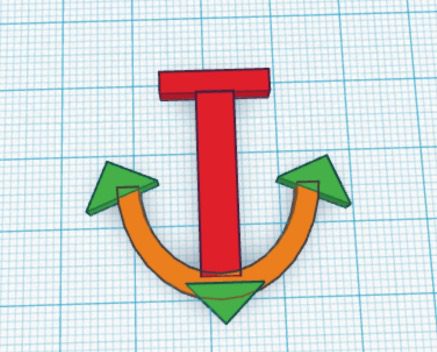
Part 6. Add a new thin tube (part 6) to the workplane. Resize the tube and merge with part 3 as illustrated:
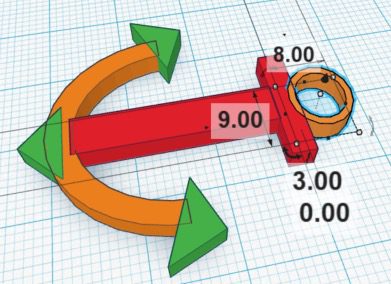
Finally, press Ctrl + A to select all shapes, and then click ‘Group’.
As an extension, ask students if they can add another two legs to their anchor.
Plenary
Review the designs that the students have produced. Invite volunteers up the front to demonstrate designing the anchor again one step at a time