
[accordion]
[item title=”Raspberry Pi Activity Handouts”]
[embeddoc url=”https://technologyforlearners.com/wp-content/uploads/2015/01/Raspberry-Pi-Activity-1.docx”]
[embeddoc url=”https://technologyforlearners.com/wp-content/uploads/2015/01/Raspberry-Pi-Activity-2.docx”]
[embeddoc url=”https://technologyforlearners.com/wp-content/uploads/2015/01/Raspberry-Pi-Activity-3.docx”]
[embeddoc url=”https://technologyforlearners.com/wp-content/uploads/2015/01/Raspberry-Pi-Activity-4.docx”]
[embeddoc url=”https://technologyforlearners.com/wp-content/uploads/2015/01/Raspberry-Pi-Activity-5.docx”]
[/item]
[/accordion]
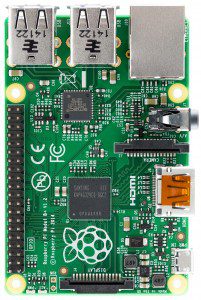
The Raspberry Pi is a very small computer (about the size of a credit card). It was developed in the UK by the Raspberry Pi Foundation to encourage the teaching of basic computer science in schools, and in the words of the Foundation “put the fun back into learning computing.”
One of my ongoing projects at school has been to run a Raspberry Pi extra-curricular club for upper Key Stage 2 students.


Before you use the lesson activity handouts, you will need to make sure that the school’s firewalls do not prevent you or your students from installing programs on the Raspberry Pi. Firewalls can block users from installing software without administrative access. Most schools have firewalls to make sure that there is sufficient bandwidth. When running a Raspberry Pi club, talk to your system administrator to make sure that the Raspberry Pi devices are exempt from the firewalls in place. This is because occasionally you or your students will need to install certain programs in order carry out the activities. The system administrator can remove firewalls for the Raspberry Pi devices by making a note of their IP addresses and including these as systems not included in the firewall protection. Users of the Raspberry Pi computers can then install software through the LXTerminal without any problems.